Tutorial Guide: How to Use the Shopy Shipping Rules Guide Effectively
Shopy Shipping Rules is a powerful Shopify Plus app that enables merchants to fully customize how shipping methods are shown at checkout, based on the customer type (B2B or D2C), company. Designed to simplify complex shipping scenarios, the app helps brands streamline the checkout experience, reduce friction, and improve conversion.
To use the Shopy Shipping Rules Guide effectively, follow each step in order—starting with basic setup, then move to advanced options like company-specific rules.
Step1. Shopify Plus Integration
1. Search for Shopy Shipping Rules Pro in the Shopify app store or find us here: https://apps.shopify.com/shopy-shipping-rules-pro
2. Click ‘Install’ and follow the instructions. Then, select your subscription.
3. Quick Setup Guide instructions are shown below.
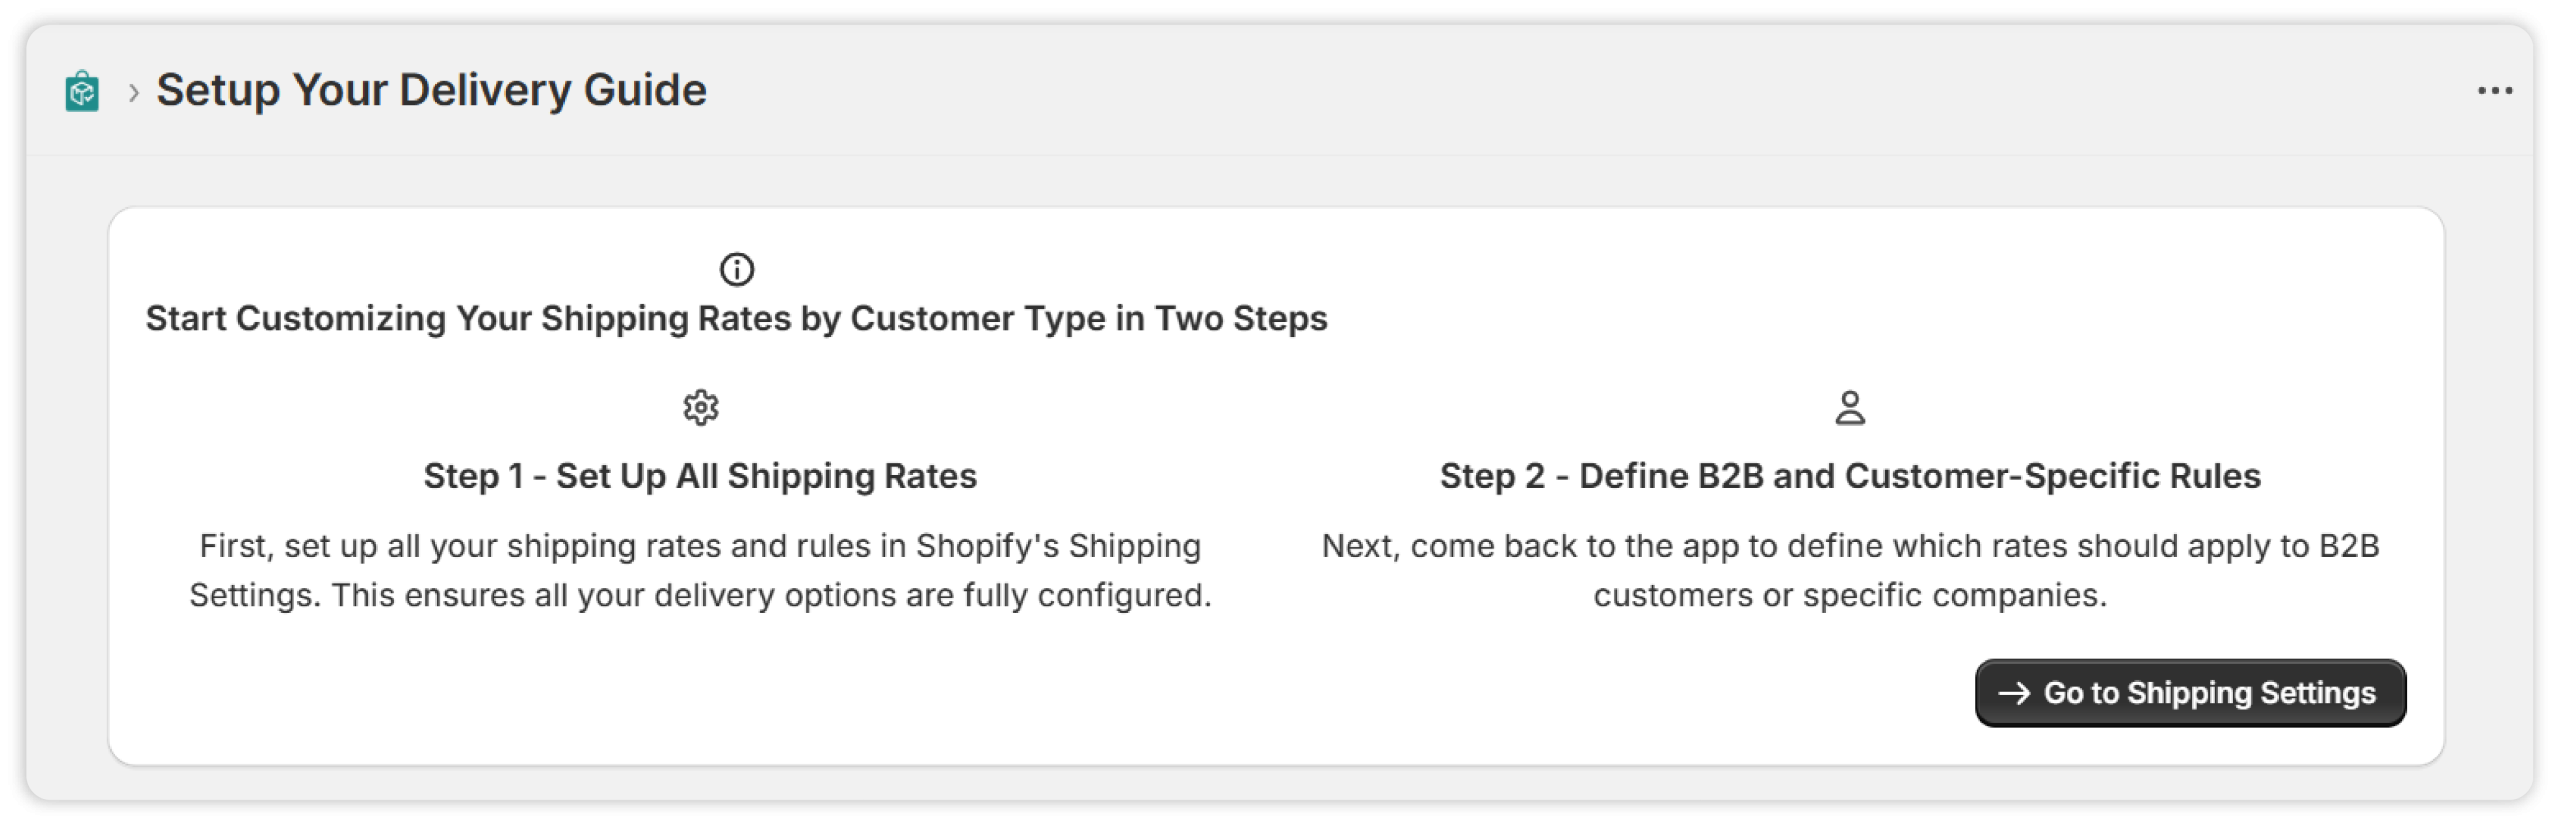
Step 2: Access the Shopy Shipping Rules Dashboard
1. Log in to your Shopy admin panel.
2. From the left sidebar, click on Settings.
3. Navigate to Shipping and Delivery. (https://admin.shopify.com/store/{{store-name}}/settings/shipping)
4. You will see a dashboard displaying existing rules and a button to create a new one.
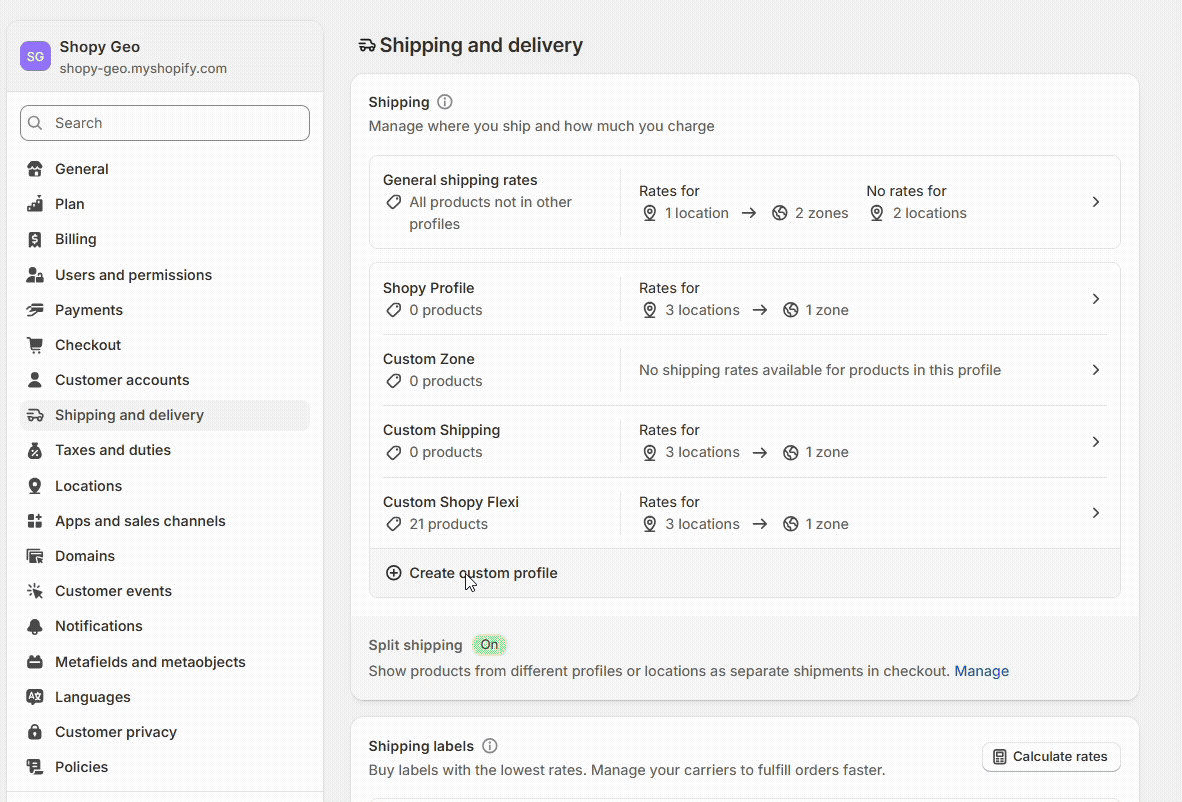
Step 3: Create a New Shipping Profile (Optional)
1. Click the “Custom Profile” button.
2. A new shipping profile form will appear where you can define or fill in the following things.
a. Name the Profile: In the Profile name field, enter a relevant name (e.g., Fragile products).
b. Add Products
- Under the Products section, click “Add products”.
- Select all products that fall under this profile (e.g., Selling Plans Ski Wax).
- Click Done.
c. Set Fulfillment Locations
- You will see a list of your fulfillment locations (e.g., India, Canada, Warehouse).
- Make sure each location is accurate and active.
- Edit if needed using the pencil icon next to each location.
d. Add Shipping Zones
- Under Shipping zones, click “Add shipping zone”.
- Name the zone (e.g., “Domestic”, “North America”, or “Europe”).
- Select the countries or regions this zone will cover.
e. Set Shipping Rates
- After selecting a zone, click “Add rate”.
- Choose either Set up your rates or Use carrier rates (if available).
- Enter custom rates based on location or order price.
f. Save Your Profile
- Once zones and rates are set for all fulfillment locations, click Save.

Step 4. View Shipping Profiles & Methods
- Inside the app, you’ll see a list of all available shipping profiles.
- Expand each profile to view associated shipping methods.
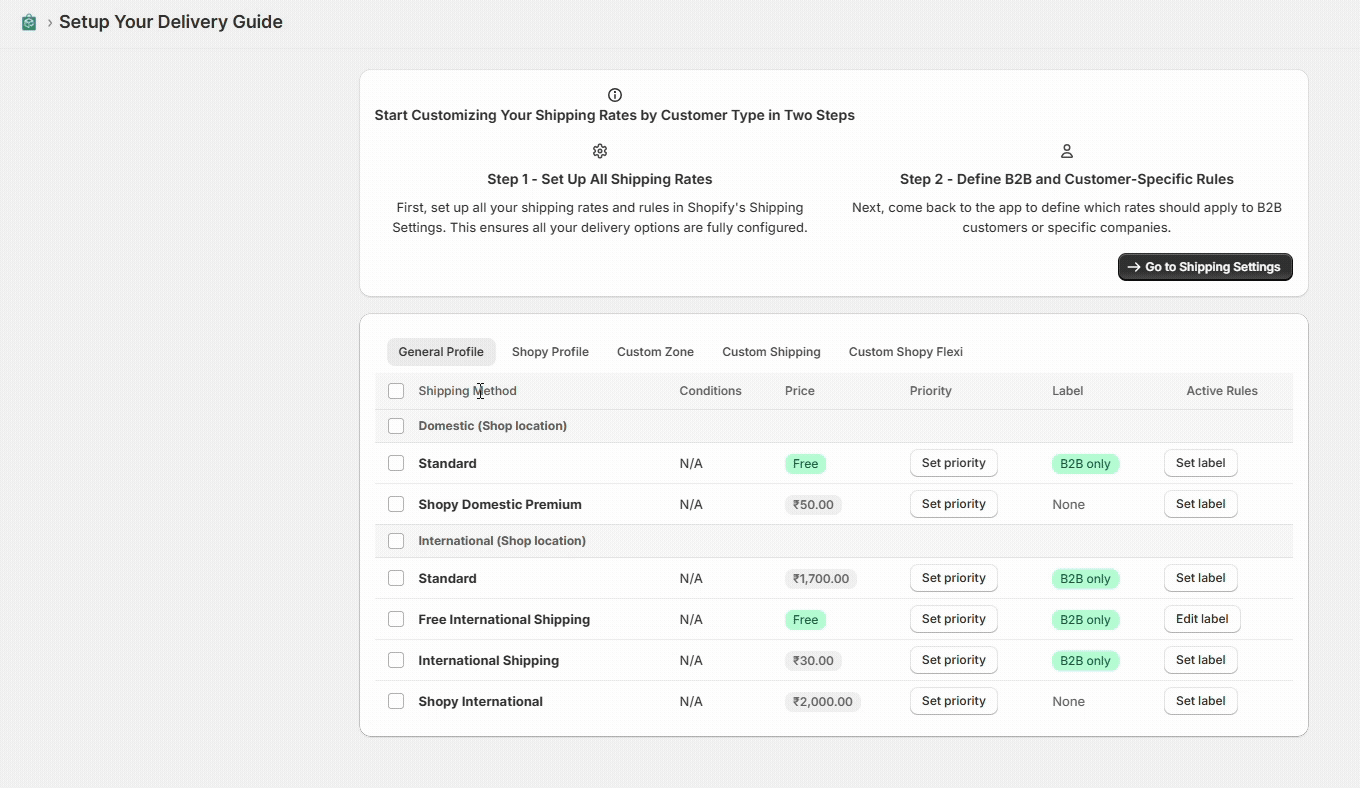
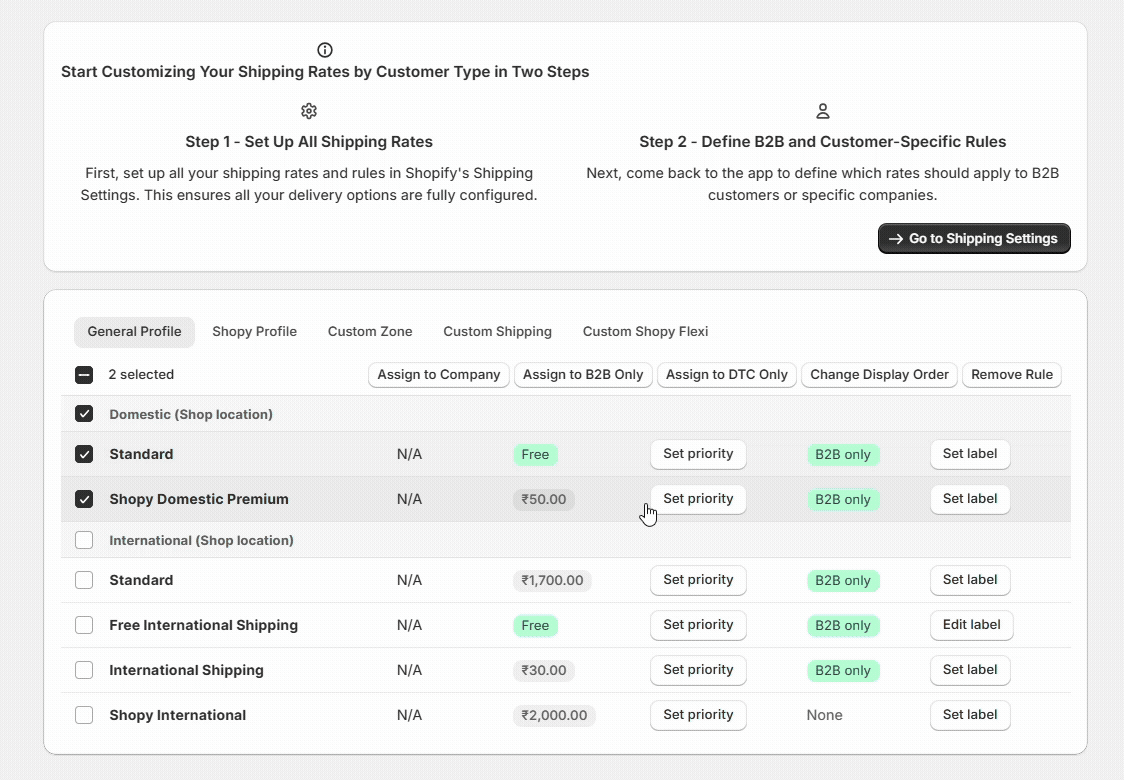
Step 5. Configure Shipping Rules
- You can now apply rules to tailor the shipping experience:
- Assign shipping methods to:
– D2C (Direct-to-Consumer) customers
– B2B (Business-to-Business) customers
– Specific companies
- Edit labels: Change how shipping methods appear at checkout.
- Reorder methods: Sort shipping methods for better visibility or priority.
- Make sure to save changes after applying rules.
Step 6. Go to the Storefront (Front-End)
- Open the test storefront URL (provided)
https://shopy-shipping-rule.myshopify.com/shopy-shipping-rule - Proceed to checkout using one of the following test customer types:
a.B2B Customer
- Log in using a B2B test customer account (assigned as B2B).
- Proceed to checkout and observe the customized shipping rules.
b. D2C Customer
- Log in using a D2C account (Classic Accounts).
- Verify that different shipping methods appear according to the rules set.
c.Guest Checkout
- Add a product to the cart and proceed without logging in.
- Confirm that the default shipping method rules apply based on the general logic of the app.
Step 7. Verify Results
Confirm that the correct shipping methods are shown for the customer type.
Ensure:
– Labels are updated as configured.
– Methods are ordered as set.
– Hidden methods do not appear if excluded by the rule.
– Company-specific rules are respected where applicable.
Step 8. Test Multiple Scenarios
Repeat checkout for each customer type to ensure all configurations work as expected.